Asma Allah

Tuesday, June 28, 2011

How to Achieve Total Body Awareness in Swimming (Do you know what your body does in the water?)

I don’t have to tell you that swimming is a wonderful sport with countless benefits, but many people unfortunately struggle to realize their full swimming skill potential to enjoy those benefits. It might sometime seem, there is an impenetrable wall which a swimmer cannot get through to reach the next level. This could also be referred to in the sports terminology as a plateau. Whether, the plateau means that your times are not getting faster or swimming just does not seem easier or you just cannot get passed a particular skill. This could be very frustrating and often times can also lead to the sport abandonment which is, of course, quite sad. No matter of the swimming level you are at, reaching a plateau in some point of your training or learning is just a reality and it will happen. What if I were to tell you though that there is a secret passage way through every plateau to get to the next undiscovered world. It is just like in the Jules Verne famous novel A Journey to the Center of the Earth, one just needs to find the right passage and new amazing world full of mind boggling discoveries awaits on the other side.


Ok, that is enough of the philosophical mambo jambo. What I really wanted to talk to you about today is the mindful body awareness control in the water. If you feel like you have reached your plateau, perhaps gaining a total body awareness could just be the hint you need to get to the next learning stage.

Do you know what happens to your legs during a breath? Have you ever paid attention to what your hands do when you push off the wall? These and many more body awareness questions is what separates successful aware swimmers from the mindless individuals who just go up and down the pool without even a thought about their stroke. Fair enough, if someone does not want to learn to swim properly, mindless swimming is a way to get away from the real world and relax, but mindless swimming with a proper technique would definitely give them much more pleasure and relaxation. Total and controlled body awareness is a key to a successful and enjoyable swimming experience. Learning to swim or improving on your swimming skills can be at times an overwhelming task as there are million and one things a swimmer should think about, a proper head position, above the water high elbow recovery, hip rotation, front high elbow catch, nice narrow kick during Freestyle or proper breathing rhythm. Putting all of these body movements together and control them in a proper way is a magical thing which comes with a lot of practice, however, if a beginner swimmer tries to think about all of the above swimming aspects at once, it is usually a disaster and it always looks awful.

To help us with this, we break the stroke down to miscellaneous swimming drills instead of swimming the full stroke all at once. If you read this blog regularly, you have heard me mention many swimming drills which are specifically designed to work on one part out of the million and one that you should think about. This drill isolation technique is the only way to learn the proper swimming body movements and then imprint them to your muscle memory. It is like with reading. If I were to put in front of you the Jules Verne adventure book, I mentioned earlier, when you are five years old, you might look at me in dismay and it will feel overwhelming, however, if I teach you your ABCs first and then build gradually on top of those skills, by the time you are ten years old, you will reach for the book with your own initiative and will devour German professor Lidenbrock’s adventures in full immersion within several days.


Arm moving away from middle body line

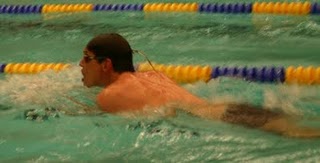
I’ll not discuss any particular swimming technique drills here today, but I’ll point out and isolate a couple of unconscious movements that you more than likely are guilty off. I’ll focus mainly on freestyle as that is the most common stroke, but the same thought process applies to everything you do in the water. One of the toughest thing to learn for a swimmer is to separate and control different parts of your body. For example: when a swimmer takes a breath during freestyle, it usually means their entire body rotates at the same time with the head as one big stiff piece of styrofoam float. Unfortunately, this is not the right way to swim freestyle and it causes many problems. If your body is stiff and it rotates as a whole at the same time with your head, your front arm will more than likely shift from being nice straight and pointing forward to being driven to the side (in other words, crossing over the imaginary line in the middle of your body or going too far away from it). This causes your body to go in a snake-like (zig zag) direction instead of forward. So, lesson number one, relax your body and make sure when you take a breath to the side you do not take your body and arm with it. The proper way to do this is to rotate your hips and then slightly after that move your head separately to breath by rotating your neck when you are on your side. Also, lubricate that shoulder joint of the arm that is extended forward and keep the arm stretched out forward. As you can see, a simple breath requires the coordination of a lower shoulder joint looseness, hip rotation and neck rotation. All separate, controlled movements which have to happen almost at the same time. Hence total awareness of your body movements while swimming.


Scissor kick for balance support

Another big issue is spreading ones legs too far apart during one kick cycle. You will notice this flaw usually during breathing again. A swimmer with this problem will appear to have a normal narrow kick, but during the breathing stage of the stroke, he/she will spread the legs apart in the horizontal direction, like a slow motion scissor kick. So the pattern of the kick could be something like kick, kick,kick, kick, kiiiiiiiiick, kick, kick, kick, kick, kiiiiiiick etc.The reason this kick happens is the fact that the swimmer uses the big slow kick for balancing support during the breath. Next time you are in the pool with fellow lap swimmers, watch underwater from behind and see if you can spot this irregularity in the kick. Then try to become aware of it during your own swimming. I guarantee that you have it in one size of the kick or another. To fix this scissor kick problem, you should re-read the paragraph above in regards of lubricating your shoulder joints:). The loss of balance feeling which causes the scissor kick is usually caused by the cross over of the lower arm during the breath, so by being in control of your separate body part movements and not crossing over you will eliminate the scissor kick flaw. You can also kick to a beat in your head and if you skip a beat, then you know you have the scissor kick syndrome :). OR just rub your toes against each other with each kick and if there is a period without a toe touch, you know you got it bad.:).


There are many more of these small nuances that are done on an unconscious level and unless a fellow swimmer or a coach points them out, the swimmer in question will never notice them. So remember, next time you are out there doing your thing, practice total body awareness and try to notice what each separate part of your body is doing. Pick one part of your body and follow its movements in your mind through one lap and see if you can visualize exactly what it does. Ones you discover an issue, find a drill (not a full stroke) which helps to fix it. continue reading...

Learn to Control your Breathing (Drills to improve your lung capacity in swimming)

It is not a secret that a swimmer has one of the best lung capacities from all athletes or at least should have. :) . Here are a few ways how you can improve your breath holding ability during every day practice.


1. Lungbuster - exhale all your air and when no air is in your lungs, push off the wall and either sprint fly or free for a 25 or sprint fly kick underwater while in streamline with maximal speed of undulation
2. Good ol' underwater swims - 40x25m underwater on 40 etc.

3. Hypoxic swimming - do a set of your chosen distances (3x400 or more) and vary your breathing by 50s or 100s as follows. 1x50 breath every 3, 1x50 every 5, 1x50 every 7, 1x50 every 9 and repeat all over again.
4. Fast fly kicks on your back - do a set of sprint fly kicks in the streamline, head alined with eyes looking up (not behind you), fast undulations coming from the bottom of your ribcage. Why on your back? Answer: To even out your kicking muscles due to the fact that majority kicks are on your front and also, because it is harder to keep the air in. If you can't keep the air in and it is escaping through the nose, use a nose plug (don't be afraid - top athletes do it). That is the last thing you need, air bubbles coming out of your nose.

5. Underwater turns - pick a favorite distance (not below 300) and have a set where you swim from inside the flags-to the wall-to the flags underwater, so only the section in the middle of the pool between the flags is above the water, the rest below.

6. Front snorkel - one of a great ways to work harder in the water is to limit your oxygen intake. Front snorkel is a wonderful tool which will do just that and it will help you with your head and body position. The frontside snorkel is also used for training your proper head position. Even David Marsh, a head coach at the Auburn University in Alabama, is fond of this simple tool and describes its use in his DVD set The Auburn Way .

7. Not taking breaths into the turns and off the turns. This practice is perfect for training to help you get out of it as much as you can. Take one stroke into the turn and one stroke out of the turn without breathing.

POWERbreathe Plus 2 Fitness Model Lung Muscle Trainer

www.amazon.com

Nose Plug

www.amazon.com

8. Breathless relays - Sprint fly or free as a relay, however, without breathing. If you are not skilled in non-breathing swimming, start with 25's, if you are more advanced I'd do 50's to make it more challenging. There is a catch though. If a person takes a breath during their part of the swim, the relay is penalized by one more swim or by time or any other penalty you can think of to make it interesting.

As Richard Quick, former Stanford's Women's Swimming Coach, mentions in his Championship Winning Swimming Videos, underwater swimming is a 5th stroke and up to 60% of your races can be swam underwater. So here you have it.
One last note, remember that when racing, it is not good to go into an oxygen debt, that is why you'd want to incorporate some of these excercises into your training. And also keep in mind that while in competition, if you have a perfect stroke and body/head position, you can take as many breaths as you want without impacting your speed (there is nothing wrong with that). You will swim faster with more oxygen.

For helping your breathing, you can use Power Breathe (just 2 times 30 breathes a day and you'll see a difference within a week).
Feel free to leave a comment if you know of any other interesting ways to help your lungs get fit.

How to improve your kicking? (Freestyle Kick Drills)

18 comments In this post, I will discuss a few tips and tricks on how to improve your kick or how to make kicking more fun.
Let's start with the basics.

a.) Kicking without keybboard (kickboard :) thanks @4th Dwarf) is a must for majority of the kicking exercises. Advantages include: working on stabilizing body (your core), improving balance, easier on the shoulders and much more. If you have to use a kickboard, cut it in half, so it is small and makes you work. Finally, if kicking with kickboards - do flipturns with both of the arms staying on the kickboard. This will help you with your stomach and keeps you focused.

b.) Keep in mind that kicking on your back is much better for you due to the fact that you exercise the other side of the leg which equalizes the leg muscles (since most of your swimming is on your front).
c.) When using fins, it is best to use zoomers. If you do not have money for zoomers, simply cut off the tips of your fins to make a pair. :)
Here are some helpful drills:


1. Wall kicking. Start kicking holding the wall. Kick 15 sec easy, 15 sec sprint and then push off right away and swim 6-beat kick free to the other side where you will grab the wall and continue kicking. So if you decide to do 20x25 of this, you will never stop kicking, until you get done with all the 25s. Feel free to change the interval sprint/easy kicks as you wish.


2. Whistle kicking. This exercise requires a kickboard. Select a good distance, for example 500 meters and then have your coach blow the whistle every so often to let you know that you should start sprinting, when he/she blows again, you may slow down, but continue with kicking. Or you can select a time interval like 30 minutes and see how far you can get during this time.


3. Shoe kicks. Get yourself a pair of old tennis shoes. Do 6x50 with a kickboard and tennis shoes on. Pick a slower interval, because this is not easy, but breaks up the monotony.


4. Stretch cord kicks. Get a short stretch cord, attach it to the block and have a set of explosive kicks off the wall. E.g. 5x (30 sec sprint+30 sec rest).


5. Breaststroke on your back. Arms are in the streamline position, you are laying on your back and perform powerful breast kicks. The most important part is to keep flat on the water with your head back and your knees underwater at all times. Heels of your feet should almost touch your buttocks.


6. Vertical kicking. There are many variations of this excercise.

a.) Sprint - Do short intervals of fly kicks as fast as you can and count how many you have done. Try to increase the number of kicks each time.

b.) Longer distance - You can kick with your arm in the streamline, on your head, at your side or by you body. Make sure to keep nice and straight posture + your head out of the water.

c.) Fun weights - To make this more challenging, you can hold a bucket with water above your head. To make it even more fun, you can split your swimmers into groups of 2 or 3 and give them waterproof medicineballs to throw to each other.

d.) Push offs - Lastly, if you feel creative, you may have the swimmers push of the bottom as high as possible in streamline while kicking fly and not let the body fall deep back underwater.

Feel free to leave a comment if you have more kicking sets you'd like to share with us. Happy kicking

Do you know how to swim breaststroke? (Top 5 most common breaststroke mistakes)

Knock knock. Who is there? Head hovering right above the water, perhaps even with regular rimmed glasses on and dry hair, arms slowly pushing the water to the sides with a rhythmic, lazy, and very wide breaststroke-like kick in a weird angle to the bottom of the pool.


Vertical breaststroke by Mr. Wright

I am sure you know who I am talking about. The most common breaststroke swimming position in our swimming pools all around the world. In the Czech Republic we have a name for this type of head above the water, lazy breaststroke swimming style. We call it "paní Radová" breaststroke. In literal translation, it means "Mrs. Mayor". In the olden days, the stereotypical wife of the town's mayor used to be very respected individual, lazily strolling through the town with her nose held high. And this was translated into the swimming terms when someone swims very slow breaststroke with the head above the water at all times as if they are above anything else.

You know, however, that to properly swim and enjoy breaststroke, the "paní Radová" style is not the way to go. This type of breaststroke puts quite a lot of pressure on ones lower back since the swimmer needs to bend to keep the head above the water. Ok, this is a bit of an extreme and most people who are at least a bit serious about learning to swim breaststroke do not swim like that, but there are a few commonalities and pitfalls that appear in breaststroke swimmers' strokes. Below are just a few of the most common breaststroke mistakes out there:
1) Excessive arm pull past shoulders - one of the biggest pitfalls during the breaststroke arm movements is the exaggerated pull which causes swimmer's arms and elbows to go too far back, passed the shoulders. The current form of breaststroke technique actually puts a lot less emphasis on the arms than the kick, but many swimmers use their arms to move forward instead of their breaststroke kick and this is causing them to pull too far back with their arms. Imagine a wall 1 meter (~3 feet) tall and 5cm (~2 inches) thick. The top of the wall is nice and flat. Pretend like you'd sit on your knees with your chest to the wall and bring your arms over the wall, so you are basically resting on your armpits on top of the wall. Your arms are free and you can move them around on the other side of the wall. Now try to do a breaststroke arm pull. It has to be small, because you cannot move your arms through the wall toward your body. This is almost like swimming breaststroke. Another way to try this in the pool is to hang on the lane rope (as if it was the top of the wall). Hang on the lane line at your armpits, extend your legs horizontally behind you and try to do a breaststroke pull. Again, you cannot move your elbows passed the lane line backwards. You can practice these mimicing exercises a few times and then try it when you swim and remember, smaller is better.
Arm hesitation and head movement by C-Serpents

2) Taking a breath too late - along with the problem of too big of an arm pull as described above, comes the late breathing mistake. One of the first principles of swimming is that if a body part (head, arm) is taken out of the water, there always has to be another body part which serves as a support in the water. The more body parts that are above the water and the longer they are above the water, the easier it is for the swimmer to sink down. In other words, the harder the swimmer has to work to keep afloat. Same principle applies during breaststroke breathing. When your body rises to take a breath, your head is above the water, so you need to minimize the time your body is above the water and use the arms for support. The common mistake here that I am talking about is taking a breath when swimmer's arms are already by his/hers shoulder area or even worse, by his/hers hips (see mistake number 1). When this happens, body (head) is out of the water, but there is no support in the arms to keep the body afloat as the arms already finished the pull, therefore, the swimmer feels like they are sinking every time they take a breath. So, next time you are breathing in breaststroke, remember, take a breath at the same time or before you start your pull (when you arms are still stretched up front) and finish the breath (head in the water at the same time you are stretching your arms forward.

3) Hesitation in the middle of the stroke - if you have read my post about how to use your arms during breaststroke, you already know what I am talking about here, but if not, here is the scoop. The goal position of swimmer's body in breaststroke is right below the surface of the water. The important key element is the hips which should ride at all times very close to the surface of the water. The "high hip" position, is very vulnerable during the time when swimmer just finished the pull and is ready to return the arms back to the front position (this is called the arm recovery). It is at this time (hands are right in front of your chest) when swimmer's hips are forced down by the hands' above the water position. So, the longer the swimmer takes to get the arms back forward the more likely are the hips to sink away from the surface. Many swimmers (even competitive athletes) make a big mistake by pausing the hands in the chest position before returning the arms forward. In reality, it should be totally opposite, there should not be a pause, the arms should actually speed up as the swimmer throws them (along with the upper body) forward. A good way to practice this is by using a drill where you use freestyle kick with very fast breaststroke arms. This drill will not let your hips sink since the freestyle kick is supporting them, but it will get you tired very fast if you keep pausing in the breaststroke arm pull.

Eyes should look more down, not forward.

4) Head movement instead of body movement - this is a very common mistake and if I were to venture a guess, it is practiced by 90% of the swimming population out there. Contrary to the belief, there is no (or very little) neck movement during breaststroke. It is opposite of butterfly, where you should slightly move your neck to get the head out of the water. You can read about that in the top butterfly mistakes post. In breaststroke, you can imagine you have a neck collar (one of those you get in a hospital, also called the cervical collar) which does not allow you to bob your head up and down. Instead you should move the chest along with the head. You might now wonder: "well why shouldn't I move my head. It works fine for me." True, you can swim breaststroke with the head bobbing, however, you are not then swimming properly up to your potential. The head bobbing introduces unnecessary up and down motion to your body which causes you to loose the forward motion engagement as well as hips at the surface position (see point 3 above) and increases your drag. You can practice this by utilizing a few tricky drills. One way to get your head immobilized is to put a tennis ball or a bit bigger ball under your chin and keep it there while you swim. The other way, which I like the best is to utilize the Finis front end snorkel, but use it backwards in the back of your head to not let your head move up from its natural position. In other way to think about this is, if your face is vertical (eyes looking straight ahead) during the breathing cycle, it is wrong. Your head is an extension of your neck, so you need to look in an angle towards the water somewhere in front of you in order for your hips to stay at the surface.


5) Improper breaststroke kick - I discussed the proper breaststroke kicking sequence in one of my older breastroke leg post, however, let's talk about it again. Proper breaststroke kick is a must if you want to succeed in swimming this wonderful stroke. The most common mistakes in kicking are a scissor kick, too wide of a kick or the worst, modified butterfly kick. The main ingredient to a good breaststroke kick is the revelation of what part of your leg actually pushes the water and where. So, let me shed some light on that.


a) Breaststroke swimmers always need to push water backwards behind them since they want the kick to propel them forward. In the scissor kick (wrong type of breaststroke kick) the water is pushed to the sides and in too wide of a kick.

b) The proper way to push water behind swimmer's body is by utilizing the inner shin (from knee down) and the inner foot (from ankle to your big toe) as the main parts. In the scissor kick and modified butterfly kick (wrong type of breaststroke kick) it is the front shin and front foot that is wrongly being used. In the too wide of a kick (wrong type of breaststroke kick), it is only the sole of swimmer's foot that stomps the water backwards which actually generate almost zero propulsion forward. As you see, all the three variations are using totally different less efficient propulsive mechanisms to get a swimmer forward.


The best way to learn the proper inner shin and inner ankle position is to place your feet in the right alignment against a swimming pool wall while holding onto a lane line and then very gently push off (with your inner ankles touching the wall - foot rotated outward). Keep repeating this leg wall alignment many times until you feel comfortable and are able to mimic the same ankle rotation in the water.


There are of course many more aspects to a proper breaststroke swim, however, if I'd list them all, it would be for a short book ;). I hope you learned something about breaststroke today and remember, to improve in swimming or as a matter of fact in anything in life, trying new things and understanding why something is done is the key to success. So go out there and modify your breaststroke for the better. One way or another, you will discover something new, even if it is just more realization that this is not the way to do it. Have fun and keep swimming

Legs of Steel (My legs sink like a rock during freestyle or while floating)

This is an additional post on proper head position while swimming freestyle. I know you might be tired of hearing the words "put your head down" while you swim, however, believe me if I tell you, this is the building block of your swimming. Without the proper head position, your stroke will not be as efficient as it could be and you will always work a bit harder and get more tired easier. One other reason I decided to write up one more post about the proper head position in freestyle is the simple fact of repetition and word association. Imagine I was standing on a pool deck and watch you swim and once in a while I'd tell you to put your head down into the water, so you are more streamlined and your legs rise up. After a little while, every time you swim and you just catch the glimpse of me strolling around the pool deck and perhaps watching you swim, a switch in your head will say "ahh, is my head too high? put my head down", because you associated the trigger words with me. In our case, here on the blog, you do not have me walking around the pool deck to repetitively remind you about the proper head position in freestyle, but if you are following my advice from the previous post you are well on your way and this post can only benefit you.


If you have done all the previous exercises pretending to be a tree log and extended tree log and your legs are still sinking, don't despair. First, check if your head is in the right position. Don't be afraid to bury your head down in the water, even let some water go over your head, so you are floating with your head underwater. This should help a little. Second, slightly increase your kicking and this will help to keep your legs up. Also, remember, we are not breathing yet. The exercises are meant to be done only for short period of time to get you used to the correct head position. If you continue struggling with the sinking legs problem, you should check out the shinfin™ leg fins. This simple piece of equipment does wonders with sinking legs.

When we are on the topic of breathing, before you start floating, take a deep breath, so your lungs are full of air and keep you at the surface without problems, then when you start floating, keep exhaling your air at a very steady slow rate (DO NOT hold your breath in). You will see that it relaxes you more during the floating exercises to slowly let the air out. You will also notice, that you will not be as tight and will very slowly start loosing your buoyancy. When you run out of breath or you think you are starting to sink too much, just stand up and repeat the exercise.


Neck without wrinkles, nice and extended.

blog.swimator.com

Arm extended.Keep it still.

The shoulder continues its rotation until you are on your back.

Front arm with fingers towards the bottom.

Your hip continues to rotate until you are on your back

Eyes toward the bottom of the pool

blog.swimator.com

Head back and eyes on the ceiling.

Next step is to learn to take a breath without stopping. So, you are floating on your stomach in the half extended tree log position. This is the same as a regular extended tree log position, except that only one arm is pointing forwards and one arm is at your side pointing backward. Your head is still buried in the water (with the back of your head barely dry or just slightly under water). You are slowly exhaling your air out of your lungs and when is time and you need to take a breath, slowly rotate your body to your side where your arm is extended forward and continue rotating until you are on your back and can take a nice breath. How do you rotate to your back? By using your kick and hips to rotate. So, when you lay on your stomach with your right hand extended, start rotating your left hip up and right hip down, so you can roll to the right side on the extended arm. At the same time adjust your kick slightly to help you with the rotation (very teeny weeny scissor like kick).


So, that is it. Add this breathing drill to your daily routine and we'll continue to build up our body position further in a next lesson about body balance

Getting water up my nose while swimming. (How to plug your nose, so you do not choke on water?)

3 comments The efficient movement of our bodies in the water while swimming does not come natural to majority of our water filled planet's population. Putting our faces in the water and having fun around and in our local pools, lakes, oceans, seas or rivers is, however, as common as your favorite bread.

                                                           image by lintmachine

Though a very common skill such as holding your breath under water is easy to master, many unlucky individuals never get the hang of it and are not able to put their head/face under water without holding their nose or using a nose plug. There are a few reasons why these unfortunate folks never grasp this easy to learn skill of not having to plug their nose when they go under water. I am going to venture out and say that the number one reason is that nobody has taught them in the right way to do this and thus subjecting them of life full of water up their nose, an uncomfortable feeling indeed. Many instructors do not spend the time to explain why the water goes up the nose and what are the correct exercises to prevent it. They just simply suggest wearing a nose plug or plugging the nose. Though, none of these are actual solutions to the problem, just small patches. Try learning how to swim freestyle while holding your nose. That is an impossible feat and plain silly if you ask me. Also don’t take me wrong, I don’t have a problem with wearing a nose plug, on the contrary, for example, I recommend my swimmers to wear nose plugs during competitions for their backstroke swims, so they don’t loose air out of their lungs while doing their underwater kick. Nonetheless, I also don’t like to see and do unnecessary things and wearing a nose plug for a front style swimming stroke such as freestyle or breaststroke is definitely not necessary.


So, how do you control the air and water in your nose?

First, let’s look at the problem. If you are one of the unlucky individuals, the issue at hand is that you are not able to plug your nasal passage and thus the difference in pressure outside in the water and inside your body is forcing the water to go up your nose (there is really nothing to stop it). Furthermore, when you then manage to get your head out of the water and try to take a breath, you do not isolate mouth breaths from your nose breaths properly, so you do end up taking a breath with both the nose and mouth at the same time which causes even more discomfort since your nose is already partially filled with water.


                                                              image by BillPStudios

Don’t despair though, there is always hope. To plug your nasal air passage you will have to use a small muscular area, located at the back of your throat, called the soft palate (Velum). When the soft palate is closed, it separates your nasal cavity from your oral cavity, so air only flows through your mouth. Simple? Yes, actually it is. With a few straight forward exercises you will be able to close the nose like everybody else.


As a first step, to feel the soft palate, you should practice pronouncing, so called velar consonants. In the English language, they would be for example the "ng" ending of the word "swimming". Notice where the back of the tongue touches? That is your soft palate. Feel free to use a mirror to checkout what is happening in your mouth.


Now, you know where your soft palate is, so let’s close the nasal passage with the help of so called stop consonants. There are 2 sets of these consonants, depending on where you want your air to flow. The "T", "P", "K" and similar type consonants are so called oral stops and "M", "N" consonants are nasal stops. Try it, If you say the word "swim" and pause at the "M" letter, your soft palate is in the position where air can be exhaled from your nose and not your mouth. On the other hand, and this is more interesting for swimming and plugging your nose, if you say the word "kick" and stop your tongue from finishing the word at the first letter "K", you will notice that you can softly exhale out of your mouth, but not your nose. Hence, your nasal tract is closed and no water (when submerged) can get in.


And there you have it. No more water up your nose when going under water. I’d suggest for you to practice the different consonants and the tongue positions out of the water and when you are ready, get into the shallow end where you can stand and start dipping your head in with holding the "K", "T", or "P" oral stop consonants, so your nasal passage closes. When this becomes easy. Add a slow bobbing rhythm, so you go down under water for 5 seconds, then come up, take a quick breath (only through your mouth while holding the "K" consonant) and back down for 5 seconds. Like you’d be a buoy on the water going rhythmically up and down. After you no longer have to hold your nose when you go under water, move onto the basic swimming while repeating the tongue exercises in your head. After a while you will start plugging the nose with your soft palate automatically without even thinking about it.


Remember, be patient as these exercises might take days, but also for some weeks to master, but if you prevail, I am confident that you will succeed. If you have tried many times to get rid off the water in your nose during swimming and even the above mentioned soft palate consonant technique does not work for you, perhaps, before you go the nose plug route, you could opt into a small mask which actually covers your nose as well as your eyes. This way, there is no danger of water ever getting into your nose. I am not suggesting you wear a regular scuba mask for swimming, but there exists a very small scuba mask which very closely resembles similar type swim goggles. The Dacor Bandit scuba mask has a very low profile and works very well as a last resort solution.


Did you manage to get rid off the water up your nose problem or found some other technique that works best for you? Don't hesitate to share with us your experience.

Breaststroke lesson - How to use your arms?

1 comments It has been another long stinch of not posting, so I will try to redeem myself. :). This post will focus on how to use your arms in breaststroke. There are also a couple of videos that will demonstrate some of the info I am about to give you. If you are more interested in how to use breaststroke legs just click the link.
Alright, let's start with a blackboard (see image with drawings). Breaststroke usually comprises of 4-5 phases, depending on how one thinks about it. One of the most important aspect of the breaststroke pull is that the arms move in one motion and there should be no pauses. The arms start slowly and speed up during the phases, similar to a motorcycle accelerating after standing on a red light. I will include the speed in kilometers next to the phases for better reference.

Phase 1: Glide (speed of arms 0 km/h)

During this part of the stroke, your body is the longest. Your head is between your arms, arms in a streamline and legs stretched with ankles touching. Your eyes are on the bottom.

Phase 2: Arm Pull (speed of arms 20 km/h)

The second figure on the above picture looks like a Y. The top two lines in the Y shape indicate arms. So, what do you do? Once your arms start coming apart from the streamline position, you have to "press your chest down" and basically spread the water in front of you. Your "palms are facing outward". Your "head is still down".
Phase 3: Elbows Together (speed of arms 50 km/h)

Then when you arms are spread apart wider than your shoulders, you need to start bending your forarms with palm starting with "your elbows locked in place" right at the surface "ahead of your shoulders". This is very important, the first part of the stroke is only in your forarms. Now, once your forarms are travelling backward, they are actually not going directly back, but moving toward your breast bone, right between your breasts. Once your fingers reach each other, "squeeze your elbows together". As you can see, in this phase, your body is the shortest with legs bent (more on this in the next post, let's only focus on arms here). One of the most important parts is to realize that "you should not pause in this phase". During the movement of your forearms from the extended Y position, your head is starting to come out of the water and your eyes are looking slightly forward. Once you squeeze your elbows your head is out of the water and looking somewhere in the distance where your eyes would meet with the surface of the water. Some swimmers like to keep their head down. I don't think that is wrong, it just depends how strong your legs are.
Let us know watch the video. There are a few flaws in the stroke, but it is good enough to give you the correct picture.
Phase 4: Arm Recovery (speed of arms 100 km/h - the arms should shoot out forward)


When your elbows are squeezed and you are taking a breath, it is time to reach with your arms forward along with the kick (more on this later). Your palms will naturally be facing upward when your elbows are squeezed, don't worry about this, you can rotate them while you are extending your arms forward. When entering water, watch for "not catching air bubbles in your palms". During the period the arms are going forward, the head is also moving toward the position in between the arms, so you can smoothly end up in the glide. "The arms and head stop their journey at the same time" and your body is in a nice gliding streamlined position now, eyes down and we go on to Phase 1 again.


As mentioned above, the arms are moving in one motion without pauses throughout the entire stroke until they are in the Gliding phase. If you are still unsure what is should look like, please watch the best breaststroker out there. Better, yet watch him break a world record in 200 meter breaststroke. I give you the world record holder and olympic champion Branden Hansen from University of Texas

Hope you have enjoyed the journey of a breaststroke pull. Next, I will help you with the breaststroke kick - one of the toughest kicks to learn, but I have no doubt that you can do it. :) If you think you already know how to swim breaststroke, why not check out the top 5 common breaststroke mistakes post.


How Not To Swim Freestyle (Top 4 Freestyle Stroke Mistakes)

Ok, let's check out how freestyle is NOT suppose to be swam for a change. In this post we examine a short video where you will see a front view of a freestyle swimmer who is swimming against the current in a small swim flume (endless pool) which is then shown on the image at the end of the post.


These endless swimming pools are quite nice, especially if combined with a front snorkel depicted on the second picture. This way you could practice a perfect freestyle swimming stroke without being distracted with flip turns or breathing. However, Let's get back to our front view freestyle video analysis.

I am not sure who this person is, but I'll point out a few obvious bad mistakes he is doing, so perhaps he will appreciate this review. First, play the video all the way through and then play it again and try to figure out yourself what he is doing right and what he is doing wrong. Then click below to see the entire post to see if you correctly identified some of the most common freestyle stroke technique mistakes
OK, here it is:


1.) Why is he looking at the camera? His eyes should be pointing toward the bottom of the pool and his neck should not have any wrinkles. Why do you need to look down? More information can be found in the body position post.

2.) Imagine a line going through his body which would split him in two halves (right and left). Now check out his hands and where they enter into the water. The hands should never reach over to the other half (passed the axis). This causes the swimmer to snake through the water instead of going in as streamlined of a position as possible.

3.)From our view, the left hand is tilted with the palm out when it enters the water. That shouldn't really happen. He could catch a lot more water if he would point his palm more toward the bottom of the pool. Also, such a hand entry is the major cause of shoulder injuries, so be careful here.

4.) Stretch, stretch, stretch. Check out how on some of the strokes his elbow is still bend and he is already starting a movement through the water. He should reach forward as far as possible to find his catch and role a little more to each side in order to achieve this. On the other hand, notice how he is keeping his head steady and only the sholders rotate, this is a very good indication of a sprint freestyle stroke.

5.) I'd also like to point out that the hand on the left from our view, when in the water, goes too far to the left when grabbing the water. He should concentrate to go more under his body with his arms, thus putting less stress on his shoulder and being more streamlined.

I am sure you can think of a few more things that are wrong with the video. Please don't be shy to share them with us on the comments section. To get your started on your way to an effortless and efficient swimming, check out our introduction to better body and head position in the water while swimming How Not To Swim Freestyle (Top 4 Freestyle Stroke Mistakes)


8 comments Ok, let's check out how freestyle is NOT suppose to be swam for a change. In this post we examine a short video where you will see a front view of a freestyle swimmer who is swimming against the current in a small swim flume (endless pool) which is then shown on the image at the end of the post.

These endless swimming pools are quite nice, especially if combined with a front snorkel depicted on the second picture. This way you could practice a perfect freestyle swimming stroke without being distracted with flip turns or breathing. However, Let's get back to our front view freestyle video analysis.

I am not sure who this person is, but I'll point out a few obvious bad mistakes he is doing, so perhaps he will appreciate this review. First, play the video all the way through and then play it again and try to figure out yourself what he is doing right and what he is doing wrong. Then click below to see the entire post to see if you correctly identified some of the most common freestyle stroke technique mistakes.


OK, here it is:


1.) Why is he looking at the camera? His eyes should be pointing toward the bottom of the pool and his neck should not have any wrinkles. Why do you need to look down? More information can be found in the body position post.


2.) Imagine a line going through his body which would split him in two halves (right and left). Now check out his hands and where they enter into the water. The hands should never reach over to the other half (passed the axis). This causes the swimmer to snake through the water instead of going in as streamlined of a position as possible.


3.)From our view, the left hand is tilted with the palm out when it enters the water. That shouldn't really happen. He could catch a lot more water if he would point his palm more toward the bottom of the pool. Also, such a hand entry is the major cause of shoulder injuries, so be careful here.


4.) Stretch, stretch, stretch. Check out how on some of the strokes his elbow is still bend and he is already starting a movement through the water. He should reach forward as far as possible to find his catch and role a little more to each side in order to achieve this. On the other hand, notice how he is keeping his head steady and only the sholders rotate, this is a very good indication of a sprint freestyle stroke.


5.) I'd also like to point out that the hand on the left from our view, when in the water, goes too far to the left when grabbing the water. He should concentrate to go more under his body with his arms, thus putting less stress on his shoulder and being more streamlined.


I am sure you can think of a few more things that are wrong with the video. Please don't be shy to share them with us on the comments section. To get your started on your way to an effortless and efficient swimming, check out our introduction to better body and head position in the water while swimming freestyle.

How to swim faster easier? (Learning to streamline your body)

The simple answer is "by learn to swim slow with correct technique". This in turn reduces your body's drag and increases your propulsion force. Swimming slower rather than faster is a bit against the common sense, however, it is the way to go trust me. It is actually the hardest thing you will have to learn on your journey to effortless swimming. Convincing swimmers to slow down and forget about how many laps they do and how fast they swim is also the hardest thing for coaches to be able to do. Most swimmers usually say "yeah right, you are crazy. Why would I swim slower?", but when they make the switch and start seeing the progress, they usually buy into this concept and are better for it.


Before you go on, I have a small exercise for you. Next time you are in the pool try the following exercise for yourself and see that I am not just pulling your leg. While swimming your normal laps, slow down in your normal body position and stroke technique to a slow motion like movement and see what happens to your body. More than likely it will be very difficult for you to swim at that speed and stay afloat in the same way you are when you swim faster. This is actually one of the reasons why people do swim faster as they are compensating for lack of correct body position with speed. Do you remember the young thugs in the lane next to you that jump in and suddenly start to thrash at the water as fast as they can and stop all out of breath when they get into the other side? Well, this is exactly what I am talking about. Besides being very annoying nuisance in the swim lanes, they cannot keep afloat unless they thrash around like that with their muscular body :).


There are a few reasons why we want to slow down initially. Let's say you are learning how to tie your shoes and someone shoes you at their regular speed. You will not grasp the movements. However, if someone takes the time and shows you the movement one by one in a slow motion and even tell you the loop it and swoop it or bunny ears poem, you are more likely to have a better start and will remember how to do it. Then you practice it very slowly until the movements become natural. When the movement is imprinted into your motor skills you can tie your shoe in stealth speed without even thinking about it. With swimming, it is very similar. When you do not learn the proper streamlined body position, arm movement, head position, catch and relaxation while swimming slow, your body will produce too much drag and turbulence while you swim, thus making swimming a much harder activity then it actually is. Which in turn will make you slower as you cannot sustain speed over long period of time. Remember, water is much denser than air, so moving through it requires a much more streamlined and thought out movement then when you move through the air. What I want to teach you is to save energy while swimming by streamlining your swimming, so you swim effortlessly and are the flower among the thorns in the pool.

Now, are you with me here or are you still thinking I am nuts. I am not going to lie to you, slowing down and learning the proper technique and body position at a lower speed takes a lot of patience as your mind will always tempt you to go faster. You might feel you are not exercising enough and wasting your valuable time, however, if you are serious about learning how to swim properly, more efficiently and faster, I challenge you to bare with me. In the next articles, I will take you through a set of exercises (phases) which will help you build up your stroke and save valuable energy during your swims. Whether you are doing laps in the pool or stroking away in the open water, the slow down approach is a must.

Your Body as a Tree Log (Correct Head Position During Swimming)

If you have gotten this far, you have seen the light and are serious about improving your swimming, so let's get started.


There are many schools of thought regarding teaching swimming, some rely on repetitive swimming a lot of kilometers or miles to improve, some swear against it and focus only on certain aspects of technique and others combine both approaches in one way or another. However, none of them are perfect and never will be. The reason being, every person wanting to learn how to swim is different and respond to different stimuli, so one approach to teach all does not work. That said, some basic themes and principles do or should be present in all swim schools and that is to streamline your body as much as possible, in a way that you swim through the water in path of the least resistance with the least effort.


In my opinion, swimming many laps with wrong technique will not give you much improvement in the long run and might cause you injuries to your

Keep you head down

blog.swimator.com
by merfam
shoulders. So, improving your stroke technique comes first and as a matter of fact, it also provides the fastest visible improvement in terms of your speed (if you are to compete) or in terms of the distance you are able to swim without getting exhausted.

Enough blabber jabber though, let's get to business. We'll first focus on shaping your body to have the least resistance in the water and as simple as this sounds, it will take a lot of repetition and patience on your part until you get it right and it becomes second nature (especially if you have imprinted some bad habits into your swim stroke already). So let's get to the basics:

Head and Body Position:

Contrary to an old school belief, the waterline should NOT be on the line where your hair meets your forehead and your eyes should NOT be watching what is in front of you (assuming you are on your belly). Your head should be suspended in the water where only the back of your head is barely dry, your neck is wrinkle free and your eyes are looking straight down to the bottom. You need to strain your head much more to keep it in the wrong position, so just relax it. There are many swimming drills and exercises you can do to practice this and below you will find a few to get your body in the right place.


1) Floating Tree Log

As a tree floats nicely straight in the water, so should you. Note, I said, IN the water, not ON the water. What I mean by this is that you should NOT strive to get as much of your body out of the water as possible. Instead your goal should be to lay streamlined in the water, more than likely with a very small part of your body above the water, but this is fully individual. You might find yourself very slightly submerged

than others and this is perfectly fine as long as you can keep your body in straight line. This is what you do: Gently push off the side or the bottom of the pool and get yourself in the position where your arms are resting relaxed at your side, your eyes are looking straight down to the bottom of the pool, your neck is nicely straight and has on wrinkles. You might even feel that you are suspended more in the water than above the water, but this is perfectly fine. Lay like this for a few seconds and than do it again and again. Suggested repetition is 10x at the beginning of each of your swim sessions. You can add a slight travel kick to keep you going forward very slowly. Important part is to get comfortable being one with the water and not trying to fight it. Let your self float in peace.


2) Extended Tree Log or Superman or both arm lead position

I do not like to call this exercise Superman as that is not what it is. Superman flies with his head looking where he is going and with arms at his side or one arm forwad, but as you read above, this is NOT the way to do it. So, let's call it the extended tree log. Same as above, you can gently push off the wall or bottom of the swimming pool, but instead of your arms being at your side, you will extend them shoulder width apart in front of your head. So you extend your tree log further. However, the important part is that they your arms stay submerged in the water and a very slight angle towards the bottom of the pool. If the water surface is 0 degrees, then you can put them in -15 degree angle. Again, your eyes are looking straight down in the water, your neck is extended with no wrinkles and relaxed. You can perform this exercise in two sets. First 10 repetitions, extend your arms and leave them relaxed, add a slight travel kick if need to be. By travel kick I mean, kick very slowly, just to help with keeping some forward motion. The second set of 10, instead of your arms being just loosely in front of you, try to extend your arms out of your shoulders, so you get them 5-10 cm further. Remember, keep them at your shoulder width to simulate the position your arm is in when you swim (so you do not learn to cross over). If done properly, you will find that it is much easier to stay afloat in the Extended tree log floating position than in the regular Tree log drill and if you extend your arms out of your shoulders even further, floating has become even more easier. The reason here is that you are adding more weight to the front of your body (muscles and bones weigh more), thus moving your center of gravity and center of buoyancy closer together and that is what you want to achieve to swim in a streamlined position.
by Brother's Keeper Comic

NOTE: Dead man's float is actually performed on your stomach :)

3) Dead Man's Float

As morbid as it sounds, this swimming drill is very good at learning to feel the positions of your body in the water and learn to streamline it. I have already described the logistics in tips for beginners post, but let me try it again. Start in a deep end of the pool, take a deep breath, put your face in the water and totally relax your arm and legs. The air in your lungs will keep your chest afloat, but your arms and legs will sink towards the bottom of the pool. When your body stopped moving and you are totally relaxed, start SLOWLY moving your straight arms to the same position as in the Extended Tree Log swimming drill described above. Remember, make sure the hands/arms do not break the surface of the water. Keep them under in about -15 degree angle (even -30 if that is easier for you). When your arms are in the Extended Tree Log swim position, then extend your arms out of your shoulders again, so you reach further. Note: your head is still relaxed looking at the bottom of the pool with no wrinkles in your neck. What you will notice here is that your legs will start slowly rising towards the surface of the water. How far will your legs raise? Well, this is fully dependent on your body composition. If you are all muscle, they will not rise to the surface, but if you have a bit fat which you should, the will rise up. You can then help to keep them there with a bit of a back muscle strength, but this takes a while to practice. If your legs are not rising, try to burrow your head and arms a bit deeper into the water and your legs should move up. Try this about 5x at the beginning of your swim workouts and when you think you got it, do it 1-3 times each time you swim, so it becomes a second nature to you.

Happy floating and remember, slow is better than fast until your streamline is perfect and you will be very satisfied with the results. After you have mastered these exercises, come back for the next lesson.

Tips for beginners of all ages (kids, adults) - (Your body as a vessel)

Not Only For Beginners


Now that you have had some time to practice getting used to the water, doing bops, blowing bubbles, putting your face in the water, holding breath and relaxing, it is time we start focusing on floating. However, don't neglect the other drills if you still have some troubles. Be patient and the success will come.

Think of your body as a vessel where your core goes from the mid section of your chest to right below your hips. When floating or swimming the head should be in a neutral position. By neutral, I mean ears just below the surface of the water and your eyes are facing the bottom of the pool. The back of your head is barely dry or even slightly submerged and your suit is no more than 1.5 inches under the surface. If your head is in a negative position, your chin is tucked on your chest and all the water is flowing way over your head (NOT GOOD), just relax your neck and your head will float. If in positive position the water is hitting you on your hairline or your forehead and your legs are sinking (NOT CORRECT EITHER). Always think, eyes to the bottom of the pool, eyes to the bottom of the pool or pretend like you are watching your shadow on the pool floor below you.
streamlined body by jayhem

You can practice getting into the neutral position by performing so called dead man's float. Now, we need to realize that not everyone will float (for example: women float better than men). So if you are not the lucky floater, you will just have to compensate for your none floating in other way (more later). Let's get to the exercise:

- Take a deep breath, put your head in a negative position (chin on chest), be vertical, let your arms down toward hips - you can imagine they are in the pockets (you will have your feet dangling almost straight to the bottom

- VERY SLOWLY start raising your head into the neutral position, with the back of the head right above the surface (even right below the surface), ears under the surface and eyes facing the bottom of the pool. Allow for the hips and legs to ease themselves towards the surface. Do not have any movement in your dangling feet or legs (if done correctly, your hips/legs should rise a little)

- Now, slowly ease shoulders, arms, and hands into the streamline position (position where your arms are above your head - like you are trying to reach with both hands for an apple on a tree). Make sure you do not raise your arms out of the water though, they should rest right below the surface.

This is your head. Lifting it out of the water will make your legs sink.

blog.swimator.com

Here are your legs - sinking like a rock :).

blog.swimator.com

Your hips are at the surface.

blog.swimator.com

(if done correctly, your hips/legs should rise even higher to the surface - see the image below)


Some of you will find yourselves laying on the surface of the water. This is brilliant, well done. Some of you will have your feet still dangling down, however, they should be higher than they were originally. Well done as well. It is not a problem that your feet are not all the way at the surface, you will just have to kick more when swimming or bury your head deeper underwater. Don't worry though, if your feet are not right at the surface, this could be changed by practicing more and more and learning to relax more and more.

You probably ask yourselves. Wow, why is it that my feet are rising. Well, it is simple. Your body acts like a teeter totter (seesaw) with your hips being the axis. Once you get the head in neutral position then stretch the shoulders, arms, and hands in the streamlined position right at the surface, you are adding more weight on one side of the teeter totter/seesaw, so your legs will automatically rise up. I have included a picture of teeter totter below if you don't remember from your younger days :).

Tips for beginners of all ages (kids, adults) - (Overcoming my fear of water)

I have finally found some time to add another post, so here it is.


Swimming is a sport that is not natural to everyone. Walking, running, biking, all of these are quite easy to master, however, it takes some coordination and stamina to learn how to swim and to top it off, before we improve our swim technique, we all have a different swimming style based on our physical ability which makes it that much more challenging. Here are a few tips that will help you to conquer the world of water.

Before getting in the water, let's think about a few things. First, swimming is done in a horizontal position which is not natural for many people. Most beginner swimmers feel disoriented when laying on the water, they sometimes feel like they are falling down. However, it is not the case. Try to think of it more as laying down into a nice and soft bed. Second, let's stay with the bed analogy. When you lay down to sleep, your body is relaxed, all muscles are loosend up. This is very similar how you should feel when floating on the water. Believe it or not, but the more relaxed you are the easier is to stay afloat. So listen to Frankie and RELAX. Third, do not use any floating equipment. True, it is easier to kick with a kickboard, however, most folks start getting dependent on the floating equipment and then it is hard to learn to swim the right way. Fourth, BREATHE. Do not hold your breath. Every time you take a breath and put your face into the water, start slowly exhaling bubbles. This will relax you and will let you enjoy your swimming exercise that much more. Fifth, do not be afraid, water is your friend. Many have mastered swimming before you. :)...

Now let's get to the good stuff. You are probably asking, so what do I do in the pool? How do I start? Well, let's see:

1.) If you are afraid of the water, you should start by standing up in the shallow end of the pool holding the wall and try to squat, so you get your chin close to the water. Breath easily. Once you are comfortable, try to go deeper under water while holding your breath. Now, don't just go up and down quickly, relax and use nice smooth motion to get up and down. If that is ok, try to stay with your head submerged for longer. If you have your goggles, open your eyes, look around you and explore the beauty of the water.

Being Relaxed in the Water? -> Priceless

blog.swimator.com
by Darkumber

2. Now that we have mastered this, it is time for bubbles. Squat down holding the wall, so your mouth is submerged and start blowing bubbles through your mouth. You are still nice and relaxed and going up, taking a breath, and down, blowing bubbles for a few seconds. Try to increase the time you are under water blowing bubbles. The exhaling with bubbles helps you relax by not keeping you too uptight while holding your breath.

3. It is time you learn how to stand back up from horizontal swimming position. You are standing up, your arms are at your side, slowly lay on the water facing down while extending your arms above your head. So you end up laying on the water as a tree log stretching your arms as far forward as possible with your palms down. Hold your breath (keep your mouth shut :)) and relax. Your body should be flat, the surface of the water should be hitting you on the back of your hair on top of your head, so get that chin toward your chest. Don't be afraid to even get your head under water a little. Whenever you are ready to stand up, palms of your hands are facing the bottom of the pool and start moving them slowly from the front above your head, down toward your hips keeping your arms straight. So, they will make nice half a circle. At the same time, slowly bring your knees to your chest. Basically, you will try to become a ball and use your hands/arms to rotate your head out of the water (backwards) and your feet down toward the bottom. Once in that position, just extand your feet and slowly stand up. Voila! Now, try it with exhaling (blowing bubbles) when you head is underwater. This will help you relax more.

At this point, you should be fairly comfortable being in the water. If not, keep practicing, until you handle 1,2,3 with ease. Good luck and remember, water is not evil. Don't think too much about it, we all have instincts to survive. :)

Update: After you have handled the above with ease, feel free to move on to the next post where I'll show you how to start your first motion in the H20.